[2 Methods to Fix] 4 Sticks of Ram Not Working
Having 4 sticks of RAM can make your system more powerful and can give a smooth working or gaming experience. That’s why you have decided to have 4 RAMs in your system and you have bought the extra ones for you. But after installing all of the 4 RAMs, you find out that, all of the 4 sticks aren’t working.
Well, it’s a very common issue among PC users and we can understand how frustrated you are right now. This issue can be happened due to software as well as hardware faults. In this article, we have discussed the reasons as well as the solutions that you can follow to make all of your 4 RAM sticks workable again.
So, let’s begin the operation and turn your system to function fully.
Reasons Why 4 Sticks of RAM aren’t Working Altogether
Having an issue with the hardware components can make anyone annoyed as well as frustrated. If it’s related to RAM, then the issue becomes more critical. Either you will need to replace the RAM or the mobo to get rid of the issue that you have encountered.
Here we have provided the possible reasons that can be blamed for preventing all of the 4 RAMs from working.
- Dust accumulated on RAM slots.
- Pin bent.
- Faulty RAM slots.
- Faulty RAM.
- The motherboard doesn’t support 4 RAM sticks altogether.
- CMOS battery messes up things.
- Faulty PSU.
- Improper RAM clock speed.
How to Make 4 RAM Sticks Working Altogether
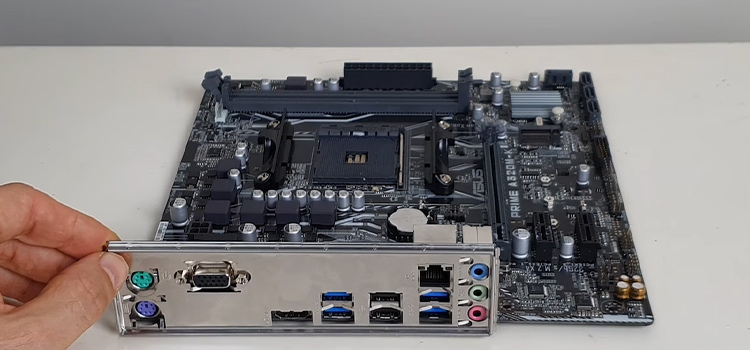
Before going for the fixes, make sure the RAMS are listed in the motherboard’s QVL (Qualified Vendor List) and the ICs of the RAMs are the same, if they are not listed then you will need to exchange them and get the listed sticks. Now, do some initial checks.
- Check the motherboard RAM slots whether they are functioning or not.
- Check the slot pins, if you found any bent pins, fix them.
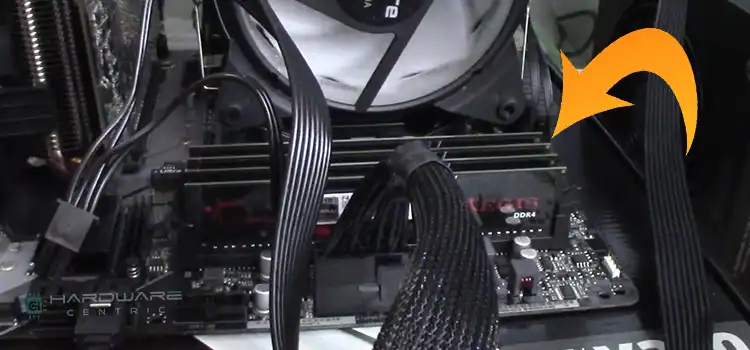
- Check whether the RAM sticks are okay or not. If they are faulty, ask for a replacement.
- Also, check if dust accumulated inside the RAM slots or not. Clean the dust and try again.
Let’s assume that, all of the issues didn’t occur in your PC and the RAMs are on the QVL list with the same ICs. But still, if you are facing the issue then follow the below-mentioned ways to fix this error.
Way 1: Disable RGB Application and Remove XMP Profile or RAM OC Settings
Few users have solved the 4 RAMs not working issue by disabling the RGB application and removing the XMP profile. When installing a new RAM, these things can conflict and prevent the RAM from working.
- Navigate to the RGB application and disable RAM RGB from there.
- Now, turn off your computer and go to BIOS.
- In the BIOS, look for overclocking option there. It will vary from different motherboards. For example, in Asus, you can find it in the Advanced mode, and in MSI, you will get a dedicated OC option.
- After that, if there you find any XMP profile or OC settings, remove them.
- Save the settings and restart your PC.
Now, check whether all 4 RAM sticks are working or not.
Note: Sometimes, enabling the XMP profile fixes the issue. If you didn’t find any XMP profile, then you can try to set one and save the settings to check whether the issue is being solved or not.
Way 2: Change the RAM Clock Speed and Timings From BIOS
Another way is, changing the RAM clock speed or RAM speed as well as the timings for each RAM from BIOS. Here are the steps.
- Install CPU-Z on your PC.
- Now go to the SPD tab, there you will find the timing for different clock speeds note down the timing of each chip. Now, take the highest value for each setting.
- Next, go to BIOS and then navigate to Overclocking Settings.
- Inside OC, look for DRAM Timing Mode. Now go to Advanced DRAM (Dynamic Random Access Memory) Configuration. There you will get the option to change the default timing.
- Change the default timing with the time that you have noted from CPU-Z.
- After that, change the RAM clock speed. For example, if you are using 2400 MHz RAM then set the frequency to 1866 MHz. Also, you will need to change the SoC voltage from the BIOS.
Now, save the settings and restart your PC. Now check whether the issue is solved or not.
Frequently Asked Questions and Answers (FAQs)
Why is my RAM stick not working?
Either you have a faulty RAM stick or the RAM stick isn’t compatible with your mobo. Also, check with the RAM slot for bent pins. Clean the slots as well as the RAM module.
How to check if your ram is working properly?
By using the Memory Diagnostic tool of Windows, you can check whether RAMs are working or not. To do so, launch Memory Diagnostic > choose Restart now and check for problems. After restarting, the checking process will be started and then it will show whether the RAMs are working or not.
Conclusion
Lastly, users started facing RAM issues when they opt to use 4 RAMs altogether. Either some of them work or all of them stopped working. Most of the time, by tweaking the RAM speed and timings from the BIOS fixes the issue. A few people also have solved it by changing their PSU. So, you can also give it a try and check whether the issue is solved or not.
Subscribe to our newsletter
& plug into
the world of PC Hardwares
![[5 Solutions] Power Supply Fan Not Spinning](https://www.hardwarecentric.com/wp-content/uploads/2023/08/Power-Supply-Fan-Not-Spinning.webp)

![[3 Fixes] Volume Information for This Disk Cannot Be Found](https://www.hardwarecentric.com/wp-content/uploads/2022/11/Volume-Information-for-This-Disk-Cannot-Be-Found-Solution-for-You.jpg)