526 CPU Liquid Cooling Pump Not Detected | Complete Troubleshooting Guide
If you think of PC gaming and high-performance computing sectors, a ‘526 CPU Liquid Cooling Pump Not Detected’ error can be a real showstopper. Whether you’re a seasoned tech enthusiast or just dipping your toes into the waters of liquid cooling, encountering this issue can leave you scratching your head.
So, what’s the big deal about addressing this error promptly? Well, imagine your CPU as the heart of your computer, and the liquid cooling pump as its life support system. When the pump isn’t detected, your CPU can overheat, leading to reduced performance, potential damage, and a less-than-optimal gaming or computing experience. It’s like driving a sports car with a clogged fuel line – you won’t get far, and you risk damaging the engine.
This is why we’re here to help you overcome this issue and get yourself out of this mess. In this post, we’ll present the troubleshooting procedure for this error, step by step, and help you get your system back on track. So, take a few minutes and stick to the post till the end.
Why This ‘526 CPU Liquid Cooling Pump Not Detected’ Error Occurs?
Let’s start by comprehending what this cryptic error message means. Essentially, it’s your computer’s way of saying, “Hey, I can’t find the liquid cooling pump that’s supposed to be keeping your CPU cool.” But why might this happen? Here are some possible reasons –
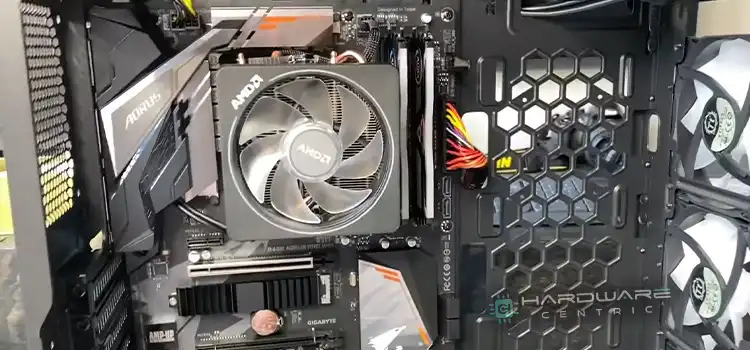
- Loose Connections: Sometimes, the cables connecting your pump to the motherboard can come loose. This can happen due to vibrations, accidental tugs, or even during routine maintenance.
- Faulty Pump: Your liquid cooling pump may have developed issues over time. These can include mechanical failures, electrical problems, or simply wear and tear from constant use.
- BIOS/UEFI Settings: Your motherboard’s BIOS (or UEFI) settings might not be configured correctly to detect and manage the liquid cooling pump. This can happen if you’ve recently updated your BIOS or made changes to the settings.
How Can I Fix the ‘526 CPU Liquid Cooling Pump Not Detected’ Error?
Now that you have a clear concept of the most possible reasons behind this error, fixing the issue will be more convenient for you. So, without delaying any longer, let’s get into them straightforwardly –
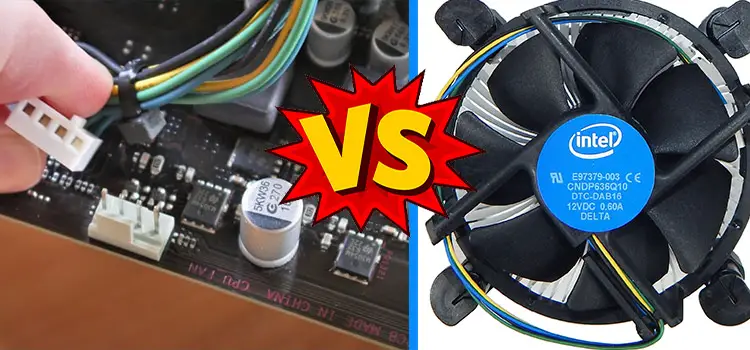
1. Loose Connections
Checking and securing all cable connections
Start by carefully inspecting the cables that connect your pump to the motherboard. Look for any connectors that might have worked their way loose. Gently reseat them, ensuring a snug fit.
Inspecting power supply connections
Additionally, check the power supply connections to the pump. Loose power connections can result in intermittent pump detection issues. Make sure everything is properly connected and powered.
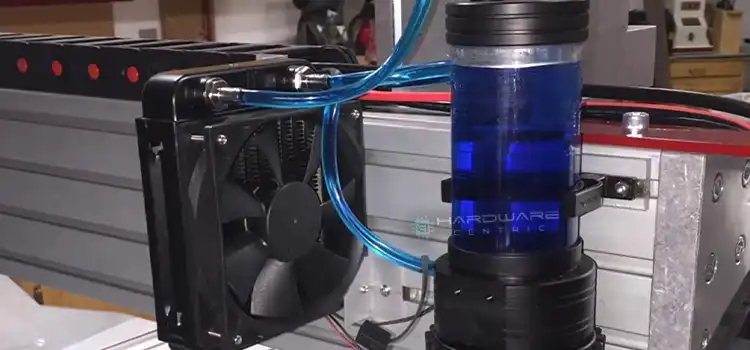
2. Faulty Pump
Identifying signs of a malfunctioning pump
Look for signs of trouble. Is the pump making unusual noises? Is there visible damage to the pump or its cables? Any leaks? These could be indicators of a malfunctioning pump.
Steps to test and confirm pump functionality
To be sure, you can test the pump outside the computer. Connect it to a power source and listen for any unusual sounds. Check for movement of the coolant. If you suspect a faulty pump, you may need to replace it.
3. BIOS/UEFI Settings
Navigating to the BIOS/UEFI settings
Restart your computer and enter the BIOS/UEFI settings (usually by pressing a key like Del or F2 during boot-up). Once inside, look for settings related to cooling or hardware detection.
Ensuring the correct settings for pump detection
Ensure that the BIOS/UEFI settings are configured to detect and manage your liquid cooling pump. You may need to consult your motherboard’s manual for specific instructions.
4. Driver Updates
Just like any other hardware component, your liquid cooling pump may require drivers to function correctly. Ensure that you have the latest drivers installed. You can usually find these on the manufacturer’s website.
Updating drivers is often a straightforward process –
- Download the latest drivers from the manufacturer’s website
- Run the installer
- Follow the on-screen instructions.
This can sometimes resolve pump detection issues related to software.
5. Firmware Updates
Firmware is a type of software that’s embedded in your pump’s hardware. It’s responsible for its basic functionality. Updating firmware can sometimes address bugs or compatibility issues.
To update your pump’s firmware, consult the manufacturer’s instructions. Typically, you’ll need to download a firmware update file, place it on a USB drive, and use the BIOS/UEFI settings to initiate the update.
6. Inspecting the Pump
Carefully inspect the pump and its components. Look for any visible damage, such as cracked housing or damaged cables. Additionally, check for any blockages in the cooling loop that might impede coolant flow.
Regularly clean your liquid cooling system to prevent dust buildup and clogs. Use compressed air to blow out any dust from the radiator and fans. Clean the pump’s water block and reservoir as well.
7. Checking the Motherboard
Your motherboard plays a vital role in pump detection. Ensure that your liquid cooling pump is compatible with your motherboard. Check for any known compatibility issues or conflicts. Within the BIOS/UEFI settings, verify that your motherboard is set up to detect and manage liquid cooling pumps. Refer to your motherboard’s documentation for specific settings.
Many motherboards come with built-in diagnostic tools. Run these tests to check the health of your motherboard. Pay close attention to any error messages related to hardware detection. If your motherboard is found to be faulty and under warranty, consider contacting the manufacturer for a replacement or repair. It’s essential to have a healthy motherboard for proper pump detection.
8. Seeking Professional Assistance
If you’ve tried all the troubleshooting steps and are still facing pump detection issues, it might be time to seek professional assistance. Don’t risk further damage by attempting complex repairs if you’re not confident in your skills.
Look for reputable computer repair shops or technicians in your area. Read reviews, ask for recommendations from friends, and ensure they have experience with liquid cooling systems.
Final Thought
To conclude, it can be said that this error can be a headache, but it’s not insurmountable. By following the steps outlined in this article, you can identify and address the issue, ensuring that your CPU stays cool and your gaming or computing experience remains top-notch. Remember, prevention is key, so make maintenance a part of your routine, and you’ll be well-equipped to tackle any future challenges that come your way. So, stay cool, keep your pump running, and game on!
Subscribe to our newsletter
& plug into
the world of PC Hardwares
![[Explored] Is The Wraith Stealth Cooler Good?](https://www.hardwarecentric.com/wp-content/uploads/2023/06/Is-The-Wraith-Stealth-Cooler-Good.webp)
![[3 Easy Fixes] 512 Chassis Fan Not Detected Solution](https://www.hardwarecentric.com/wp-content/uploads/2023/09/512-Chassis-Fan-Not-Detected-Solution.webp)