[Fix] 162 System Options Not Set (100% Working)
error 162 = system options not configured – for such bios editions is the same problem as when CMOS (Complementary metal-oxide-semiconductor) CHECKSUM Fail you receive with these other BIOSes. What you had to do was go through into bios Settings and adjust the Date and Time to anything other than original values, ideally the current date.
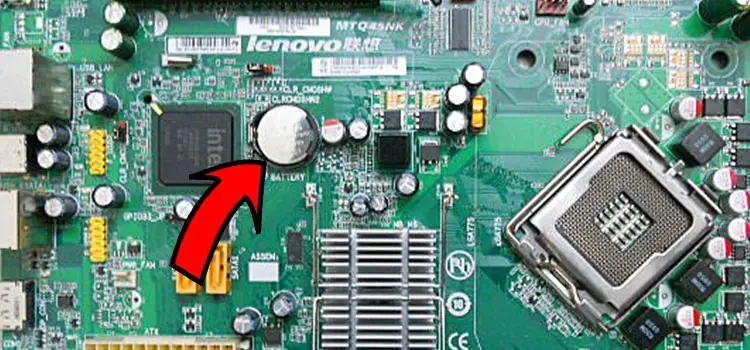
It looks as though there are choices in the Firmware that haven’t been worked as effective – whether it’s a new computer, I’d advise getting it back towards the merchant or consulting HP Support since it shouldn’t have come out of the manufacturer in that form. More probably, however, this is the CMOS battery that’s not really in good health and not preserving the technical assistance when the machine is shut off.
‘162 System Options Not Set’ – Showing Methods How to Overcome the Error
As suggested anywhere on site. reset your Default configuration to the original settings by using F10 (to enter it) and also F9 buttons (to import the presets) during startup, now and save changes and restart. If the issue reappears, then you’ll need to consider having the CMOS repair done – the official HP site might as well have information on how it’s situated as well as how to update it, whereas the replacements itself are quick enough just to acquire (most retailers & technology centers will stock them) will stock them Receiving the 162 error Must Not block the bios as well as prohibit you from receiving into the windows os on the computer’s hard drive, assuming you have that.
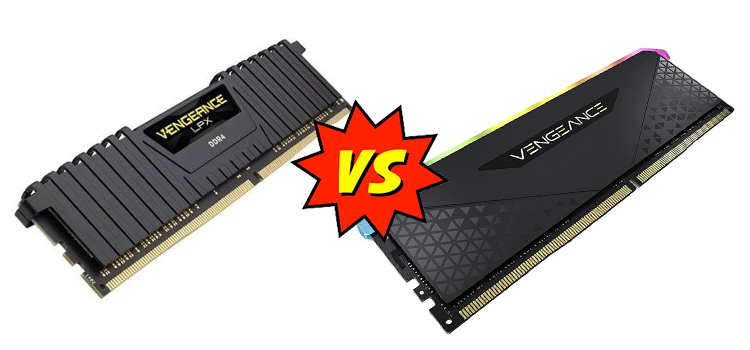
Even one of them has an inappropriate ram placed in the motherboard.
For example, this motherboard likely can utilize a maximum of 256Mb Flash memory components within every ram position, and 256Mb components certainly Should have 16 flash memory – 8 upon every side – or 8 solely on a single side – panels including an odd number of flash memory – 9 – solely on a single side or on either of both edges might Not have been permitted. The memory modules are always equal in size – maybe there are 1, 2, or three additional microchips.
If you are attempting to utilize a storage device of a higher magnitude than the maximum size the device initially came with which is not detected correctly by the bios edition – certain outdated bios editions manufactured before 2001 (your pc was likely produced before 2001) include issues that would stall the bios during launching in that instance.
Some bios flaws impact disks greater than boolean size 8.4Gb, 32Gb, as well as 64 Gb. Inside this instance, your bios edition may include whether the one(s) supporting 32Gb and otherwise 64Gb.
Inside any particular instance, the main processor cannot recognize drivers greater than 137Gb manufacturing company size = 128Gb inside the firmware and also in Window panes as the actual size even though the bios edition does not provide faults they are identified as 128GB maximum.
You get one or even more IDE disks jumpered incorrectly \s– you have an issue with the IDE information cable(s) \s– you might well have any or maybe more expired drives
Unless you unplug the hard disk drive (HDD) whether that needs to apply, or even all hard as well as CD as well as DVD drive(s) if any of that includes – the data wires – you need to be allowed to get inside the bios Configuration no issue, whether you have not assembled irreconcilable ram, \s– and a boot disk puffy in a disc disk must be identified fine, whereas if a droopy drive is installed correctly, there’s hardly anything wrong with both the disk, as well as the bios Boot Command or similar facilities catalog a disc drive initially. No system choices are set, which is symptom 162.
Cause
• The setup is wrong.
• The control system has been modified since the last startup (for reference, the insertion of a hard disk drive) like adding such a hard drive.
• A power loss towards the actual clock has happened (the meaningful clock stops working if the internal battery is not operating properly. The actual clock shuts down if the internal battery isn’t operating correctly.
Procedure
Step 1: First, you have to tab on the F1 button on your keyboard. After pressing on it, you will be able to enter the System Utilities of the HPE UEFI.
Step 2: Then, you have to run the setup utility of the server for changing the set-up menu.
For further information, read “HPE UEFI System Utilities” inside the HPE ProLiant Gen9 Maintenance Information, Volumes I just on the webpage Hewlett Packard Enterprise.
Step 3: If the problem remains, change the internal battery. For further details, visit the system maintenance and repair reference just on the Hewlett Packard webpage.
The error message will appear when the hardware has been changed and also the System BIOS settings have been made to change.
Method 1: Reset the Default BIOS
To restore the factory BIOS settings, perform the instructions outlined below.
Step 1: First, you have to press the power button of your device and you have to hold the button for at least 5 Seconds for turning off your computer.
Step 2: Then, you have to again tap on the F10 button on your keyboard and hold the button. You have to hold this button while turning off your computer. You have to release the F10 button when the text has appeared on the display screen of your computer.
Step 3: Once the BIOS Setup Utility has been shown, you have to hit the F9 key from your keyboard to pick Setup Defaults from the drop-down menu that appears.
Step 4: To choose to Save and Leave, use the F10 key on your keyboard.
Method 2: Schedule a Meeting for a Repair
It is recommended that you contact the support team for arranging a repair if the preceding technique does not fix the fault.
Conclusion
162 system options not set is a very common problem nowadays. An inaccurate set-up or any modification on BIOS settings can occur this error message. Here is a solution to fix the issue. If this solution doesn’t work for you, you have to contact the support team to fix it.
Subscribe to our newsletter
& plug into
the world of PC Hardwares

![[Explained] Can You Use DDR3 in DDR4 Slot?](https://www.hardwarecentric.com/wp-content/uploads/2023/08/Can-You-Use-DDR3-in-DDR4-Slot.webp)
![[7 Fixes] PC Not POSTing But Has Power](https://www.hardwarecentric.com/wp-content/uploads/2023/06/PC-Not-POSTing-but-Has-Power.webp)
![[6 Fixes] Selected File is not a Proper BIOS](https://www.hardwarecentric.com/wp-content/uploads/2022/09/Selected-File-is-not-a-Proper-BIOS.webp)
