How To Remove Graphics Card from Motherboard (Only 6 Steps Away)
Graphics card normally doesn’t come with regular PCs as they contain integrated graphics card. For this, many people aren’t familiar with the process of installing or removing graphics cards from the motherboard.
Removing graphics card from the motherboard may seem a little bit tricky but it is quite a simple task. You simply have to unplug the cables, remove some screws and push the tab on the PCI slot to remove it.
If you are not sure about how to remove the graphics card from your motherboard, then don’t worry, you can easily do that by the end of this article. Because we have provided step-by-step instructions on how to remove the graphics card from the motherboard here. So, what are you waiting for? Let’s get started below.
Precautions Before Removing Your Graphics Card from Motherboard
Before you start the removal process of your GPU, you need to follow these precautions:
- Turn off your PC and disconnect all cables that are attached to the PC case.
- Switch off your PSU (Power supply Unit) and disconnect the main AC power cable.
- Do not do anything forcefully, be gentle while handling PC components.
Steps to Remove Graphics Card from Motherboard
The graphics card is placed on the PCIe x16 slot on the motherboard. You need to unplug it, remove the screws and then remove it from the connector. All the detailed step-by-step instruction on how you can remove the Graphics Card from your motherboard is given below. Follow the given steps carefully to avoid any damage to your GPU or computer:
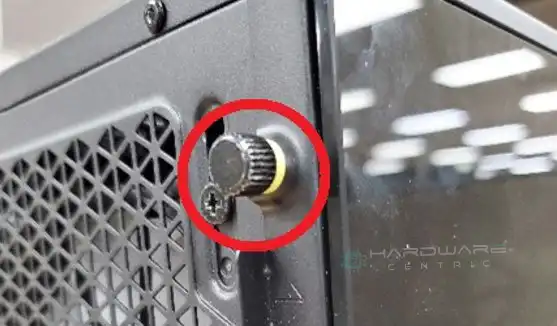
Step 1: Remove the screws from the side panel of your PC case to open it.
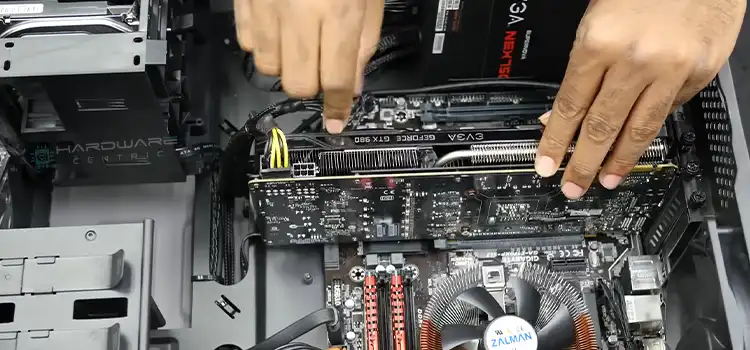
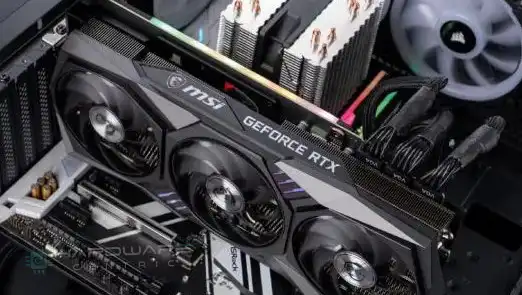
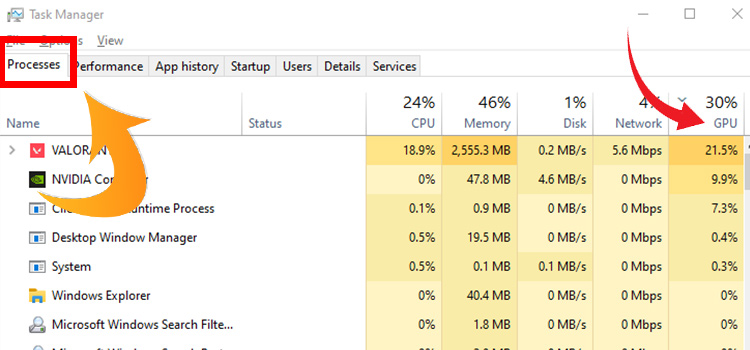
Step 2: Now locate your graphics card on the motherboard. It is placed on the PCIe x16 slot. If you can’t find your GPU, check your motherboard spec to find it.
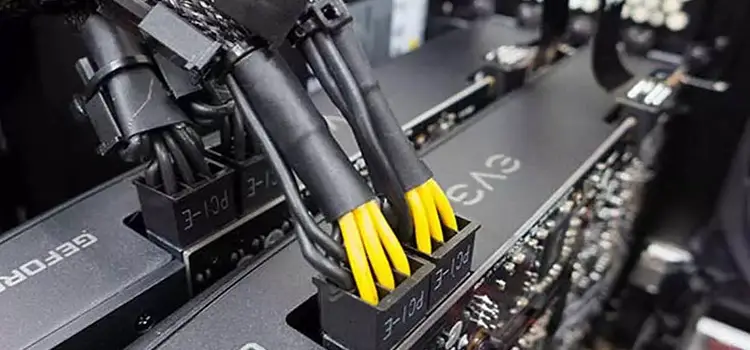
Step 3: Press down the clip on the PCIe cable of the graphics card to release the connector and gently pull it while pressing the clip to disconnect the PCIe cable of your GPU.
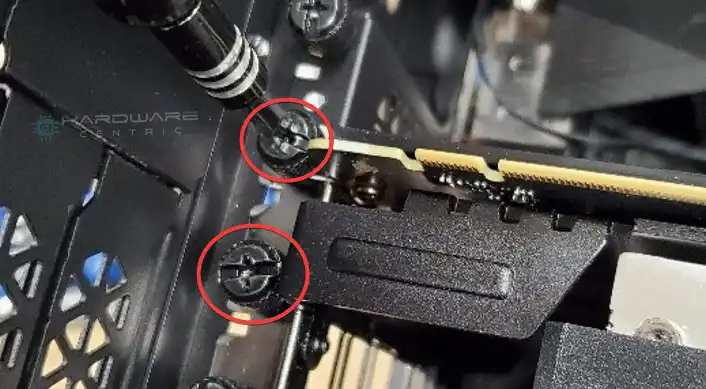
Step 4: After that, take a Phillips screwdriver and remove the screws that were holding down your GPU to the PCIe slots on the back of your PC.
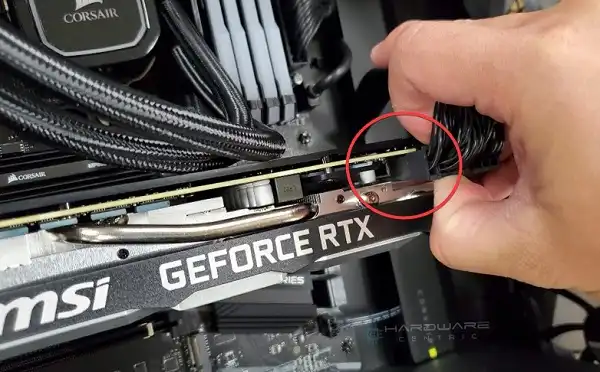
Step 5: Once the screws are removed, press down the latch (a small retention clip) on the PCIe slot to release the GPU and carefully pull it up while pressing down the latch with another hand.
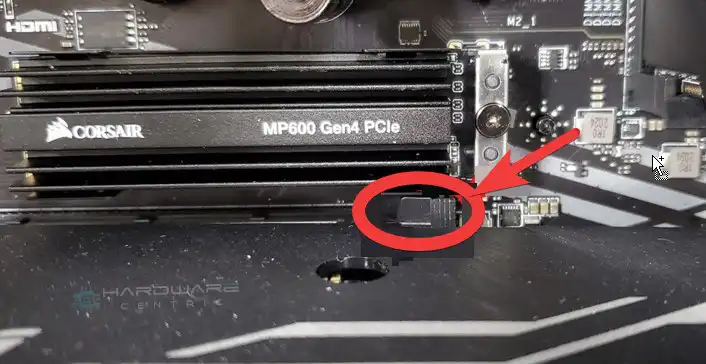
Note: Do not pull the Graphics card without pressing the latch, otherwise, it will damage your motherboard or the GPU.
In this way, your graphics card will easily come out of the motherboard. It may seem a bit tricky especially if you are removing it for the first time, but trust me, it will be the easiest thing you will have ever done once you remove your GPU once again after removing it as instructed above.
FAQs (Frequently Asked Questions and Answers)
Is It Safe to Remove GPU From Motherboard?
Yes, it is completely safe to remove GPU from the motherboard. In fact, it is manufactured to be removed and reattached to the PCIe slot on the motherboard.
How Do I Completely Remove My Graphics Card?
To completely remove your graphics card, you need to uninstall the graphics driver from the device manager and then remove the graphics card from the motherboard.
How To Disable Internal GPU In BIOS?
To disable the internal graphics card from BIOS, navigate to the Startup Menu and press the F10 key to enter the BIOS setup utility. After that, select Advanced > Device Configurations > Hybrid Graphics and click Disable.
Conclusion
To remove your graphics card from your motherboard, unplug the attached PCIe cable, remove screws, and simply remove the GPU by pressing the clips on the PCIe slots. That’s it! Isn’t this an easy process? Hopefully, you can now blindly remove any graphics card from your motherboard after reading this article. If you are still having any issues removing your graphics card from the motherboard, feel free to contact us in our comment section below and we’ll try to fix that together. Thanks for reading!
Subscribe to our newsletter
& plug into
the world of PC Hardwares


![[Fix] 2 Short Beeps and 1 Long Beep (100% Working)](https://www.hardwarecentric.com/wp-content/uploads/2022/05/2-Short-Beeps-1-Long-Beep.jpg)
