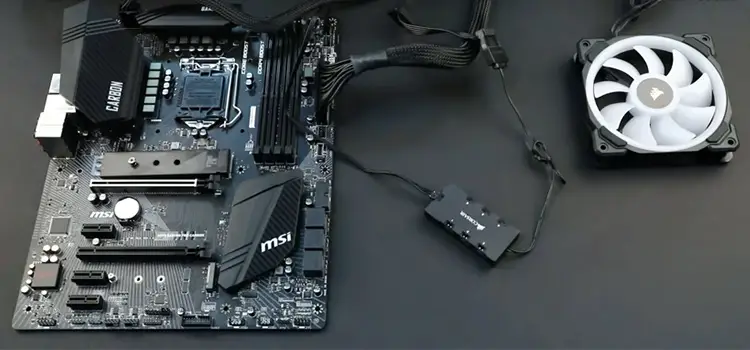
How to Connect RGB Fans to Motherboard? – Step-by-Step RGB Fan Installation Guide
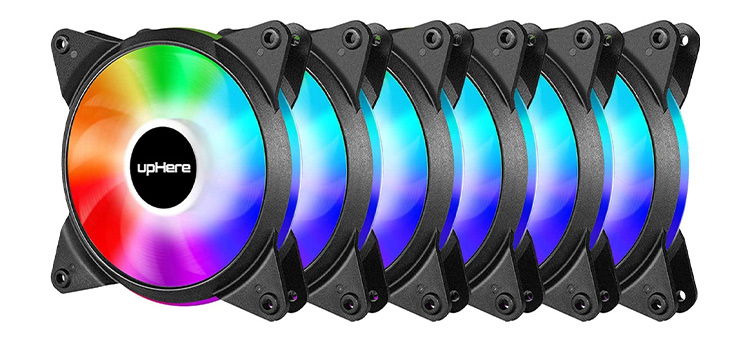
Adding RGB fans can offer you a wide range of benefits on your PC. RGB fan helps you to balance your CPU temperature with its cooling feature. RGB fans can give your CPU a gorgeous look when paired with RGB lighting. You don’t need to be a computer hardware expert to connect RGB fans with your CPU’s motherboard, you just need to follow some steps to connect your RGB fan with Your CPU.
Does My Motherboard Support RGB Fans?
Whether your motherboard is compatible with RGB fans depends on the type of RGB fan you get. If your motherboard doesn’t have an RGB header, the fan will spin, but the RGB lights may not work. However, some fans come with a controller connected to the power supply, and in this case, the RGB will work without needing a special RGB header on the motherboard.
How to Connect RGB Fans to Your Motherboard Based on Pin Types?
I am going to discuss the connection of different types of RGB fans to motherboards. There are two types of RGB fans (3-pin & 4-pin) to fit into your CPU’s motherboard. All those two types of RGB fans can be connected differently on your motherboard. You have to use a fan connector if you want to connect a 4-pin RGB fan to your motherboard. If your motherboard has no header, you’ll have to use an RGB controller to fit in. So, here you find a total 3 types of RGB based on connection interface –
- 3-Pin RGB Fans.
- 4-Pin RGB Fans.
- RGB Fans Without Headers.
(A) Connecting a 3-pin RGB Fan to the Motherboard
It is simple to connect 3-pin RGB fans with your motherboard. You don’t need any type of extra connector and controller to connect 3-pin RGB fans to your motherboard.
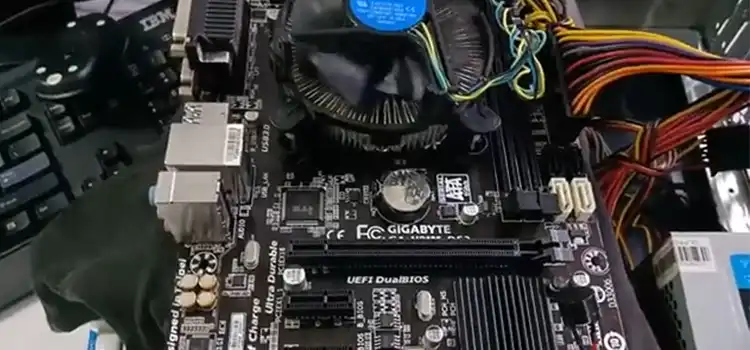
Step 1: Remove the CPU Case
You have to open the CPU cover first to insert an RGB fan on your CPU. After removing the cover of the CPU, you can easily access your motherboard’s slots, ports, and headers.
Step 2: Open the RGB fan kit and Manual
Unbox the kit with The RGB fan and read the manual before connecting the fan to your motherboard. You’ll find an RGB fan with two-wire, one with 3-pin and the other with 4-pin.
Step 3: Mount the RGB fan to the CPU Cover
Now, you have to mount RGB fans on the CPU cover with the screws provided by the manufacturer on the fan kit.
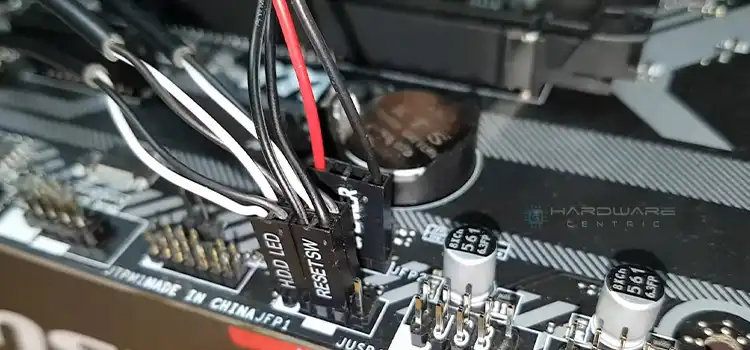
Step 4: Inserting the Wire Into the Motherboard Header
After mounting the RGB fan on the CPU case, you have to insert the 3-pin wire into your motherboard’s fan header and the 4-pin wire into the RGB header of your motherboard. You can easily locate the RGB port if you notice RGB marks on your motherboard. Press on the connections to make sure they are connected tightly.
Step 5: Cover up the CPU Case
Once you have finished the adjustment of the RGB fan on your motherboard, put the CPU cover on to finish the process.
(B) Connecting a 4-pin RGB Fan to the Motherboard
Well, it is a little complicated to connect a 4-pin RGB fan to your motherboard. You’ll need an extra RGB dual fan connector to connect RGB fans to your motherboard.
Step 1: Remove the CPU Case
To open up your motherboard’s pots, slots, and headers you have to take out your CPU cover.
Step 2: Unbox the RGB fan kit and Manual
Open the kit with an RGB fan, you’ll find some screws, an RGB fan with two 4-pin wires, and a user manual. Read the manual properly before proceeding to further steps.
Step 3: Attach the RGB Fan Connector To Motherboard Header
You’ll have to insert a dual 4-pin RGB fan connector with the motherboard’s fan header. Inserting the connector ensures maximum RPM. You can also insert a 4-pin RGB fan connector into 3 or 4 holes included in the motherboard.
Step 4: Inserting the RGB Cable
After that, you only have to insert the RGB cable of your RGB fan into your motherboard’s RGB header.
Step 5: Mounting RGB fan into CPU Cover
Now, mount the RGB fan on the CPU cover with screws provided by the manufacturer. Cover up the CPU to finish the adjustment process.
(C) Connecting an RGB Fan to a Motherboard With No Header
Yes, you may think it is complicated, but it is not that complicated to connect RGB fans with a motherboard with no header. You’ll need an extra RGB fan dual connector and an RGB controller to connect RGB fans with a motherboard with no header.
Step 1: Remove the CPU Cover
Firstly, remove the cover of your CPU. You’ll find the motherboard of your CPU. Now, you have access to your motherboard’s slots, ports, and headers.
Step 2: Open RGB Fan Kit and Manual
Take the kit with an RGB fan and open it. You’ll find an RGB fan with two-wire, a user manual, and some screws to mount the fan with a CPU cover. Read the user manual properly before proceeding.
Step 3: Connect the Fan Cable To the Slot
Now, Take out the RGB fan’s 3 or 4-pin slot cable and insert a 4-pin dual connector into the RGB fan’s slot cable.
Step 4: Insert RGB Controller
Insert the RGB controller with the cable that is not connected to the dual connector and make sure that the inserted controller is properly connected to the connector.
Step 5: Attach Cables with SATA Cable
Now, connect the controller cable with the connector of the motherboard SATA cable. It will supply power to the RGB fan.
Step 6: Mount the fan in the CPU Case
After connecting the controller cable with the SATA cable connector, mount the fan to the CPU cover with screws provided by the manufacturer. Now, cover up your CPU to finish the adjustment process.
Factors to Remember While Connecting
4 factors to consider –
- Make sure to unplug your CPU power cable
- Keep away RGB fans away from the impeller.
- Ensure that the RGB fans are away from any kind of fluid.
- Keep RGB fans away from temperature. Make sure to keep it far from any machine that causes overheating or high temperature.
How to Connect RGB Fans to Your Motherboard Based on Lighting Capabilities and Control?
Another 3 types of RGB fans are based on Lighting Capabilities and Control. They are –
- Static RGB Fans
- ARGB (Addressable RGB) Fans
- LED Fans
1. Connecting a Static RGB Fan to the Motherboard
Step 1: Check Your Motherboard:
Ensure that your motherboard has an available USB 2.0 header. You’ll need this to connect the static RGB fans.
Step 2: Gather Necessary Components
Before you begin, make sure you have all the required components. You’ll need the following:
Static RGB fans, RGB hub/bus/controller, Power source cable (Molex or SATA), USB micro-splitter
Step 3: Connect RGB Fans to the Controller
Take the static RGB fans and connect them to the RGB hub/controller. The controller typically has numbered slots (1, 2, 3).
Plug the cable from the RGB fans into the corresponding slots on the controller, starting with slot 1 and moving upwards.
Step 4: Connect the Controller to the Power Source
Connect one end of the power cable (Molex or SATA) to your Power Supply Unit (PSU).
Connect the other end of the power cable to the RGB hub/controller. This will provide power to both the fans and the LED lights.
Step 5: Connect the Controller to the Motherboard
Use the USB micro-splitter to link the RGB hub/controller to your motherboard.
Insert one end of the USB micro-splitter into the USB 2.0 header on the motherboard.
Carefully insert the other end into the micro-USB port on the controller.
Step 6: Turn On Your System
After plugging everything in, it’s time to power up your computer and check if the fans spin and the RGB lights turn on.
Please note that USB headers 2.0 and 3.0 are often located near each other on the motherboard. If you’re unsure about the location, you can consult your motherboard’s manual for guidance.
2. Connecting an ARGB Fan to the Motherboard
Step 1: Check Compatibility
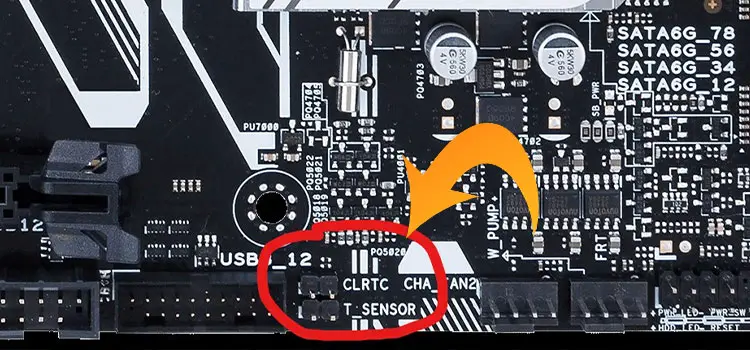
Ensure that your motherboard has a compatible 3-pin 5V RGB header to support ARGB fans. This header may be labeled as ADD_HEADER, JRAINBOW1, or JRAINBOW2 and typically has “+5V” written under one of the pins.
Step 2: Identify the ARGB Fan Cables
ARGB fans come with two cables:
System fan power connector with 4 wires (may have 3 or 4 pins).
LED power connector with 3 wires and a 4-pin connector.
Step 3: Connect the ARGB Fan to the Motherboard
Locate the 3-pin 5V RGB header on your motherboard, which matches the connector on the LED power cable from the ARGB fan.
To connect the LED power connector to the motherboard’s 3-pin 5V RGB header:
Align the arrow sign on the connector with the “+5V” label on the motherboard.
Gently connect these two cables.
Step 4: Connect the Fan’s Power Cable
Connect the fan’s power cable (the system fan power connector) to the System Fan header on the motherboard. These headers are typically labeled as SYS_FAN1, SYS_FAN2, SYS_FAN3, etc.
Step 5: Daisy Chain ARGB Fans
ARGB fans can be connected in a daisy chain fashion for synchronization. The ARGB power cable will have both a male and a female connector.
Connect the 3-pin male connector from one ARGB fan to the 3-pin female connector of another ARGB fan.
Continue daisy-chaining by repeating this step for additional fans.
Connect the male end to the 3-pin 5V RGB header on the motherboard.
Step 6: Power On
Once all connections are in place, power on your computer.
If you’ve connected everything correctly, your computer setup should illuminate with a variety of RGB colors.
Step 7: Control the Lighting Effects
To manage the lighting effects, you can use either a switch provided with the fans or dedicated RGB controller software, which may come with your motherboard or be available as third-party software.
By following these steps, your ARGB fans should be successfully connected to your motherboard, and you’ll have control over their lighting effects and colors.
3. Connecting an LED Fan to the Motherboard
Step 1: Identify the LED Fan Type
LED fans are a type of fan that displays a single, fixed color, and they do not require any RGB header or software control.
Step 2: Check the Fan’s Power Connector
LED fans typically come with a single cable that supplies power to both the fan and the LED. This cable can have different connector types, such as a 3-pin DC fan connector, a 4-pin PWM connector, or a Molex connector.
Step 3: Locate the System Fan Header on Your Motherboard
Most motherboards have multiple System Fan Headers, which are designed to power case fans, including LED fans. Look for labels on the motherboard such as SYS_FAN1, SYS_FAN2, etc. These headers usually have 4 pins.
Step 4: Connect the LED Fan
Insert the LED fan’s cable into the System Fan Header on the motherboard. Ensure the connector is aligned correctly, and the pins fit into the header.
Step 5: Check Connector Orientation
If you encounter difficulty inserting the cable, try flipping the connector or aligning the plastic notch on the connector. These notches can be subtle, so inspect them closely.
Step 6: Secure Connection
Ensure that the connection is securely in place and that there are no loose connections or cables.
Step 7: Power On and Test
Power on your system to check if both the fan and the LED light on the LED fan are operational.
By following these steps, you can successfully connect an LED fan to your motherboard. LED fans are relatively straightforward and do not require specialized RGB headers or complex software control, making them a simple yet effective option for adding color to your computer setup.
Is It Possible to Connect RGB Fans to a Non-RGB Motherboard?
Yes, it is possible to connect RGB fans to a non-RGB motherboard.
To connect an RGB fan to a motherboard that doesn’t support RGB, you can use the controller that comes with the RGB fan strip. However, connecting an ARGB fan to a non-RGB motherboard can be tricky.
This is because an ARGB fan needs to plug into a specific 3-pin 5V header on the motherboard, which is usually not available on non-RGB motherboards. Manufacturers of non-RGB motherboards don’t include this header, making it challenging to connect ARGB fans directly.
Short Questions and Answers
Question: What does RGB mean?
Answer: The three primary colors of additive color synthesis, Red (R), Green (G), and Blue (B) form RGB. All types of modern electronic displays, monitors, and screens generate RGB lights to create color.
Question: What is a SATA cable?
Answer: SATA (Serial Advanced Tech Interface) cable is a bus interface cable for connecting host bus adaptors with the Computer. It is also called Serial ATA cable.
Question: What is the difference between RGB and LED fans?
Answer: RGB is a kind of LED fan. The LED fan cannot change colors whereas an RGB fan can change into various colors.
Question: How do I connect multiple RGB fans to a single motherboard header?
Answer: To connect multiple RGB fans to one header, you can use a splitter or hub. These devices allow you to link multiple fans to a single header, providing both power and control for synchronized lighting.
Question: What’s the difference between RGB fans and ARGB fans when it comes to their connections?
Answer: RGB fans typically use 4-pin headers, offering basic lighting control. In contrast, ARGB fans use 3-pin 5V headers for more advanced addressable lighting, allowing individual LED control.
Question: Do I need any additional cables or adapters to connect RGB fans to my motherboard?
Answer: Depending on your setup, you might require splitters, extensions, or hubs to facilitate the connection of multiple RGB fans to a single motherboard header.
Question: How can I synchronize RGB fans with other RGB components in my PC for a cohesive lighting effect?
Answer: Synchronizing RGB fans with other components often involves using motherboard software that supports RGB ecosystems, enabling you to coordinate lighting effects.
Final Words
Now you have already found that connecting an RGB fan to your motherboard is not a hard nut to crack. If you want to improve your CPU performance and run it fast, and efficiently, RGB fans are the best fans for you. It will also add coolness to your CPU.
Subscribe to our newsletter
& plug into
the world of PC Hardwares