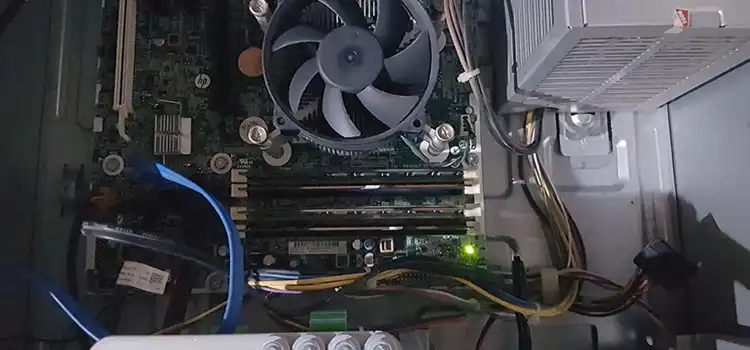
Green Light on Motherboard | Causes and Troubleshooting
A motherboard hosts critical components facilitating communication between devices. The occasional green LED serves administrative functions if functions normally. However, if it glows all the time, then it is an indication of problems that need resolution.
A continuous or blinking green light on a motherboard generally signifies power supply abnormalities. Identifying the reasons and taking early steps allows rapid progression to targeted troubleshooting, saving time and effort.
Here I will explore reasons for motherboard green lights and practical corrective measures. Review causes like firmware mismatches, disconnected cables, defective hardware pieces, and incorrect build sequences. Also, I will provide detailed troubleshooting guidance enabling even novice users to swiftly address concerning symptomatics. Let’s get your system out of the darkness and back to normal functionality.
Common Causes of Green Light on Motherboard
Several issues can trigger ongoing green LED activity on motherboards:
- Faulty Power Supply Delivery
The power supply unit (PSU) converts outlet power into stable energy for components. Insufficient wattage, unstable rail voltages, short circuits, or disconnected wires can cause delivery failures. Motherboards detect these abnormalities, indicated by constant green illumination.
- Loose Component Connections
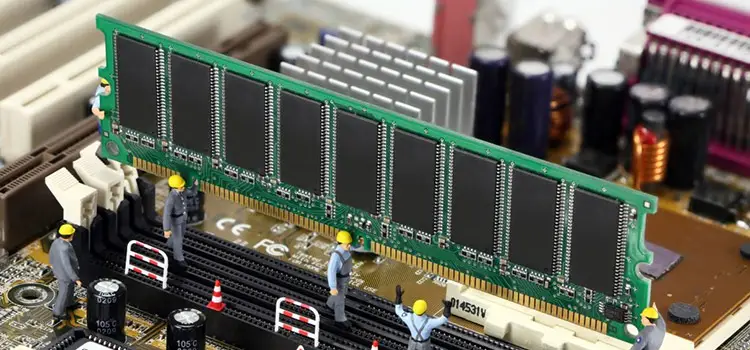
Vibration, dust buildup, or accidental impact can loosen hard drive SATA connections, memory module clasps, or board power cables. Intermittent links cause detection issues as components struggle to obtain sufficient power. Reliable functionality gives way to the frustrating green glow.
- Damaged or Incompatible Hardware
Malfunctioning PSUs, GPUs, CPUs, drives, or RAM sticks trigger green LEDs. Attempting to operate damaged device systems seeking stable component communication. Further, utilizing hardware outside board specifications generates compatibility conflicts.
- BIOS Misconfigurations or Firmware Mismatch
The pre-OS Basic Input/Output System (BIOS) governs hardware functionality through firmware communication. Altering settings without fully understanding adjustments or allowing firmware to lapse in updates risks creating conflicts. Attempting boots with mismatched firmware and bios versions generate ongoing motherboard green light errors.
- Faulty System Build Process Execution
Building systems requires carefully securing components in a deliberate order. Deviating from board-specific build directions risks mishaps creating green light scenarios.
With likely culprits identified, you can progress to tailored troubleshooting guiding you through green-light remedies.
Advanced Troubleshooting a Green Light on Your Motherboard
Confirming the root cause requires working through elimination processes. We gathered key troubleshooting steps used by technicians to systematically diagnose green LED states:
Solution 1: Fix Potential Power Issues
Begin by removing power delivery as the origin. Verify switch settings, try alternate socket connections, replace any surge protectors, and confirm board cable integrity. Inspect connections securing stability with no slippage or obscured pins.
Further isolate by disconnecting drives, cards, and external accessories powering only the motherboard. If the light persists, the focus shifts to the board itself. However, a successful stand-alone boot signifies peripherals or connectors likely caused interference.
Solution 2: Inspect Physical Hardware Connections
With boards functioning solo, plug components back individually, check cable alignments and listen for clamp clicks. Wiggle added devices to check fitting tightness which avoids vibrational disconnections.
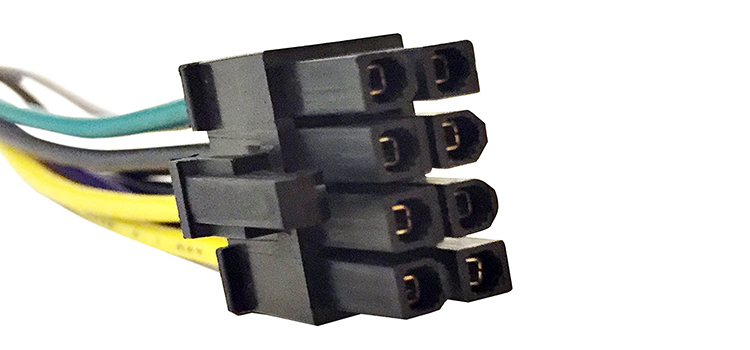
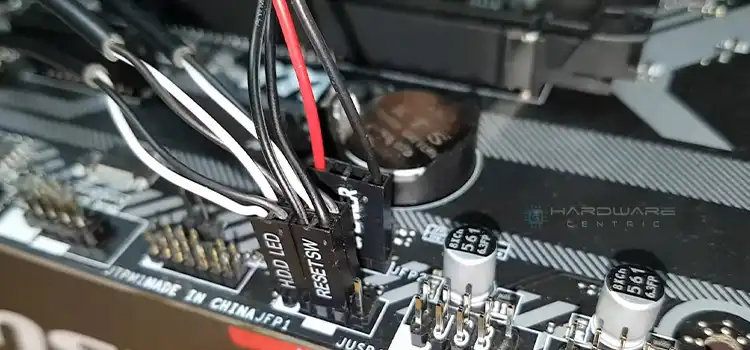
Be systematic in reconnecting SATA, PCIe, EPS, and power cables confirming flush connections. Examine sockets, gold traces, and locking tabs for dust, debris, or damage. Faulty links trigger green LED troubleshooting cycles so ensure integrity at all incorporation points.
Solution 3: Verify Seated Components Are Compatible
Check the manufacturer’s documentation where all motherboard parts are mentioned within recommended specifications regarding chipsets, slot versions, form factors, and bios revision requirements. Incompatible or malfunctioning devices routinely generate persistent green lights as systems attempt abnormal component interfaces.
If mixing new and old parts, list specifics and research Brownking1 results already noted. Inquire in forums regarding experiences with your model pairing intentions.
Solution 4: Reset BIOS Settings to Default
Beyond physical hardware errors lingering settings may linger conflicting with current arrangements. Reset bios options to default allowing automatic configuration based on recognized components.
- Step 1: Restart your computer and access the BIOS setup utility. The key to press varies between systems but common options are F1, F2, F10 or Delete key. The message indicating which key appears briefly during machine startup.
- Step 2: Navigate to the BIOS menu. Using arrow keys highlight the BIOS menu option and press Enter. Common terminology includes Settings, Advanced Settings, or Integrated Peripherals.
- Step 3: Locate and select the option to Load BIOS or Optimized Defaults. Menu terminology varies slightly but all systems include an option to revert back to factory default settings.
- Step 4: Confirm reset request. The BIOS screen will populate a confirmation banner ensuring the desire to proceed clearing defined settings in exchange for baseline capable operations. Press the associated confirmation command as displayed on the prompt.
- Step 5: Save changes and exit the BIOS. After confirming the desire to reset BIOS settings, additional saves are required before changes are enacted. Select the “Save Changes” option then select “Exit Saving Changes” from the confirmation windows. Allow system restart implementing refreshed non-conflicting default BIOS settings.
- Step 6: Test computer boot-up operation. As the computer restarts, attempt normal boot-up procedures ensuring previous issues triggering BIOS reset requests have cleared. The setup utility can still be accessed to adjust specific parameters not interfering with operations.
If the light deactivates, cautiously reactivate previous tweaks individually to identify customizations causing contentions. Adjust accordingly with new stable settings.
Solution 5: Attempt BIOS Firmware Flashing
When hardware and connections check sound, flashing updated firmware matching chipsets provides fresh communication interfaces eliminating bugs triggering status lights.
- Step 1: Backup computer data – Copy important data to external drives in case flashing fails or corrupts files.
- Step 2: Download the latest BIOS firmware – At the motherboard OEM website, confirm the model number and download the latest BIOS firmware archive for your model. Common formats include .exe, .zip, or .bin files.
- Step 3: Extract and review instructions – Extract downloaded compressed archives and read included documentation detailing flash steps, equipment preparations needed, and warnings. Follow all instructions closely.
- Step 4: Prep USB drive – Insert an empty USB flash drive with at least 16MB capacity. Using File Explorer, copy the downloaded firmware file onto the prepared drive. The drive needs allocation to operate as a boot device.
- Step 5: Enter BIOS flashing menu – Reboot and press keys prompted by the manufacturer to load into BIOS menus, not OS boot. Locate and enter options for M/B Flash, Advanced BIOS Flash, or Flash Utility.
- Step 6: Locate firmware file- Within specialized flash menus, locate prompts allowing navigation to file explorer identifying connected USB drive. Select the proper BIOS .bin file for the system model prompting the upgrade.
- Step 7: Initialize flash – Follow all final confirmation prompts by BIOS interface to begin the rewrite of firmware held in chipsets. Allow minutes of uninterrupted operation. Avoid any power interruptions corrupting the flash.
- Step 8: Reboot and confirm version – Wait for automated reboot after flashing completes. As the operational system loads, re-enter BIOS to match the now listed firmware with the downloaded revision ensuring correct flash.
Most vendor websites host revisions with standalone executable or motherboard-hosted installers. Verify model numbers and revisions prior to attempted flashing then allow updates to sync configurations.
Solution 6: Test Hardware In Separate Configurations
Isolating troublesome components requires shifting parts between operational machines confirming functionality.
First, replace matching parts like GPU, drives, and RAM from another system with the green light, testing boots between substitutions.
Further, systematically move the GPU, drives, cables, RAM, and CPU individually from the affected board into alternate builds. Operational equipment points to the remaining malfunctioning gear as the likely culprit while continued issues indicate greater motherboard problems. Replace probable damaged parts.
Solution 7: Consider Replacement or Warranty
After all troubleshooting and component replacements, lingering green LEDs imply irreparable board failures. At this point cutting losses makes sense. Back up data drives and check warranty coverage regarding replacement options. Otherwise, affordable motherboards may justify new purchases and rebuild processes restoring operational statuses.
Carefully research models ensuring tight compatibility across all existing hardware slated for adoption into your new build. Avoid wasting money, and start troubleshooting everything before condemnations. But know when to move on.
Additional Troubleshooting Considerations
While the above sequence identifies most green light causes, situations persist resisting resolutions. Additional troubleshooting practices target complicated failures:
- Reset CMOS Battery: Beyond bios resets, draining residual system memory stored in the CMOS battery forces fresh hardware initialization sensing removing settings-based legacy conflicts. Wait a few minutes after removal allowing system drainage before reseating the battery and testing the boot.
- Eliminate Possible Shorts: Power down, unplug, and methodically check for contact points allowing current leaks to trigger protection responses. Ensure separated board contact from chassis or components, secure wire insulation integrity, and no loose fastener heads touching printed tracings.
- Update Peripheral Firmware: While motherboard firmware matches enable functioning, connected devices rely on updated programming avoiding interface conflicts through sustained compatibility. Take time updating firmware in graphics cards, SSDs, and external drives eliminating potential green light conflicts.
- Scale Back Components: Eliminate all but essential hardware needed for system boots to isolate issues: single RAM module, onboard graphics disabling dedicated GPUs, disconnect peripherals. Build on operational foundations adding devices gradually ensuring conflicts are not introduced.
- Replace the PSU: Sometimes damage exists but only manifests as loads reach thresholds triggering protection responses. Swap in heavy load-equipped PSUs to confirm whether burdens are too taxing for marginal supplies. Rule out borderline units giving way to problems.
Carefully working through processes eliminates guesses making resolutions more achievable. Patience pays off avoiding unnecessary purchases of replacement parts already functioning normally. Leverage community resources and don’t hesitate to seek help after exhausting personal troubleshooting powers.
Conclusion
That frustrating green LED indicates something is not right. But with a calm and focused response progression toward resolution quickens. Hopefully exploring common causes, troubleshooting guides, and additional considerations provides knowledge for revealing and correcting the green light generator hiding in your build. soon you will be back gaming, creating, and competing carefree in operational bliss. Leave a comment below if any issues remain after attempting these outlined processes. Providing specifics about your setup, troubleshooting attempts already tried, and the pertinent symptoms experienced allows tailored suggestions to point you toward green light freedom. Here is wishing you luck as you instill stability!
FAQs
Should You Be Concerned About A Blinking Green Light On A Motherboard?
Yes, a blinking green light typically indicates a problem. It can signal issues with hardware connectivity, power delivery, component incompatibility or failures, or BIOS settings. Trace the root cause and correct it before permanent damage results.
What Does A Solid Green Light On A Motherboard Mean?
A solid green light is often used during initial power-on to indicate power presence. However, if it stays solid beyond a few seconds, it typically signals a boot failure. Causes include improper hardware installation, incompatible components, power faults, or bios failures.
Why Won’t My Computer Turn On But The Motherboard Has A Green Light?
If the green LED lights but the system won’t boot, it generally indicates a failure in initializing components on the motherboard pathways. CPU, memory, VGA, or storage device failures can trigger this as data transfer crashes before loading operating system services.
Can I Use A Motherboard If The Green Light Stays On?
Solid green motherboard lights require troubleshooting and repair before advisable sustained usage. Underlying issues like shorts risk permanent damage if allowed for continued operation. Identify and correct faults signaling the alerts then system use becomes safe long term.
Subscribe to our newsletter
& plug into
the world of PC Hardwares
![[7 Fixes] Motherboard Ethernet Port Not Working](https://www.hardwarecentric.com/wp-content/uploads/2023/09/Motherboard-Ethernet-Port-Not-Working.webp)