How To Connect The Power Button To The Motherboard: A Step-By-Step Guide
Have you ever looked inside your computer case and marveled at the complex web of components? Among this labyrinth, the power button plays a crucial role, as it’s the key to kickstarting your PC. But, have you ever wondered how to connect that tiny button to the motherboard? If you’re into DIY PC building, this guide is your roadmap.
In simple terms, connecting the power button to the motherboard is like linking your ignition key to the engine. It’s the first step in bringing your computer to life.
Let’s get started with the process, step by step.
Process to Connect the Power Button to the Motherboard
Here are the simple steps to connect the power button to the motherboard:
Step 1: Gather Your Tools
Before you begin, ensure you have the necessary tools and components at hand:
- Your PC case with a jumper.
- A motherboard with labeled pins.
- Your motherboard manual.
- Adequate lighting and a spacious workspace.
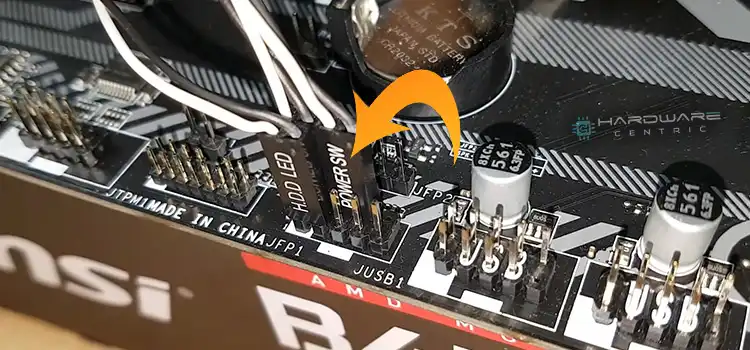
Step 2: Locate the Motherboard Headers
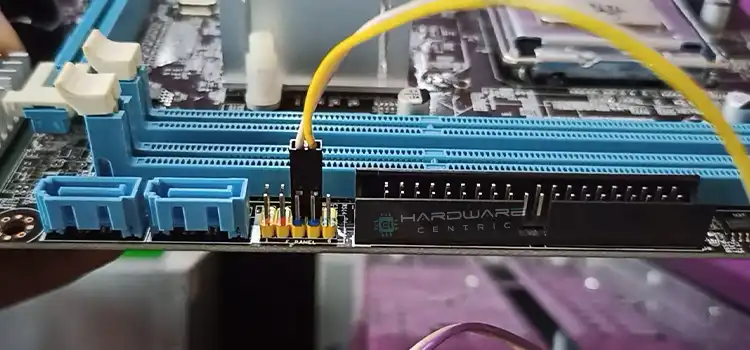
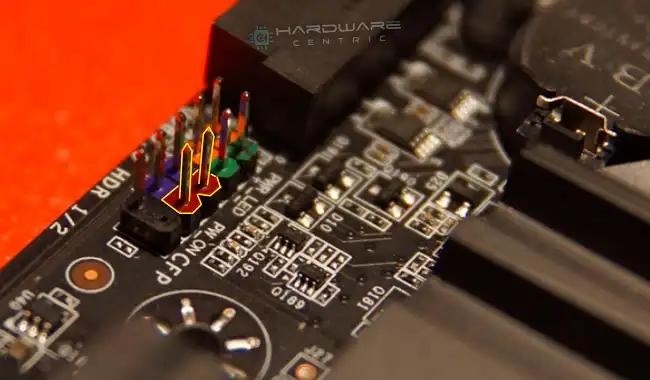
Open your PC case and carefully examine the motherboard. You’ll spot a cluster of tiny pins, often located at the bottom right corner. These are the headers for your power button, among other things.
Step 3: Check the Manual
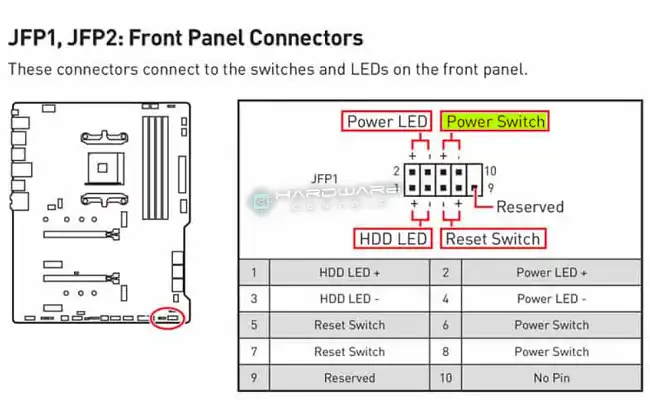
Your motherboard’s manual is your trusted companion for this task. It will have a detailed diagram illustrating the motherboard headers and their functions. Look for the section that mentions the front panel connectors or power button.
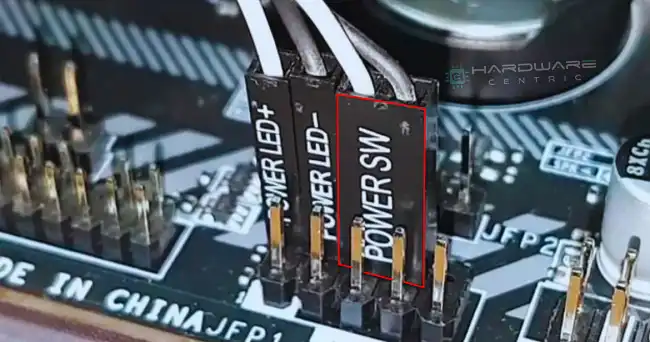
Step 4: Identify the Power Button Pins
Within the motherboard header cluster, you should find the power button pins. They are usually labeled as ‘PWRBTN’ or something similar. There are two pins in this pair.
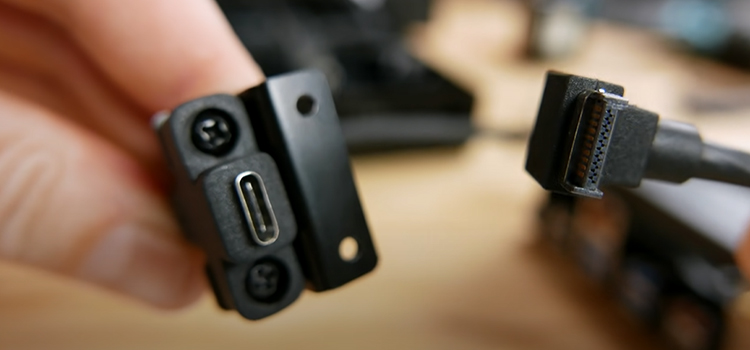
Step 5: Examine the PC Case Wires
Now, shift your focus to the power button wires from your PC case. These are usually bundled together and have a connector at the end. This connector may be labeled but if not, one wire is typically white or labeled as ‘P’ (for power), and the other is colored or labeled ‘G’ (for ground).
Step 6: Connect the Wires
Here comes the critical part. Using the manual as a reference, carefully connect the power button wires to the motherboard’s power button pins. The white or ‘P’ wire should be connected to the ‘PWRBTN’ pin, and the colored or ‘G’ wire should connect to the adjacent ground pin, often labeled ‘GND’ or ‘PWRG’.
Make sure the connectors fit snugly and securely. The order of connection doesn’t usually matter, but consult your manual to be certain.
Step 7: Test the Connection
With the power button wires connected to the motherboard, it’s time for a quick test. Reassemble your PC case, ensuring everything is in its place. Plug in your power supply and monitor.
Press the power button, and if all is well, your computer should spring to life.
Troubleshooting Tips
- If your PC doesn’t turn on, double-check the wire connections. Ensure they are snug and in the correct pins.
- Sometimes, the power button connector might be labeled differently or lack clear markings. In such cases, consult your PC case’s manual, if available.
- Some motherboards have a separate power button extension cable that makes the process simpler. Consult your motherboard’s manual for this option.
Wrapping It Up
Connecting the power button to your motherboard might seem daunting, but with the right guidance, it becomes a straightforward task. It’s the first step in bringing your PC to life, and once you’ve mastered it, you’re on your way to becoming a DIY PC-building pro.
Subscribe to our newsletter
& plug into
the world of PC Hardwares