How To Remove 24 Pin Connector From Motherboard | A Step-By-Step Guide
Ever been in the midst of a DIY computer build or upgrade and felt that pang of panic when a connector doesn’t budge? Yeah, I’ve been there too. One of the most notorious connectors that often plays hard-to-get is the 24-pin power connector on the motherboard. This essential link provides the motherboard with the power it needs, but removing it can sometimes feel like a wrestling match.
But here’s the thing: With a bit of patience, the right technique, and perhaps a dash of bravery, you can safely remove the 24-pin connector without breaking a sweat (or any pins!).
Join me on this detailed walkthrough.
Steps to Remove the 24-Pin Connector
Removing the 24-pin Connector from the Motherboard is quite simple and a straightforward process. However, you have to be very careful while doing it to ensure that you don’t damage the power cable or the motherboard. Here are the steps that you can follow to remove the connector:
Step 1: Power Down and Safety First
Before doing anything, ensure the computer is turned off. Disconnect the power supply from the wall socket. Safety should always be priority number one. Give it a few moments to ensure any residual electricity is dissipated.
Step 2: Open Your PC Case
Using the appropriate screwdriver, remove the side panel of your PC case to access the motherboard and its connections.
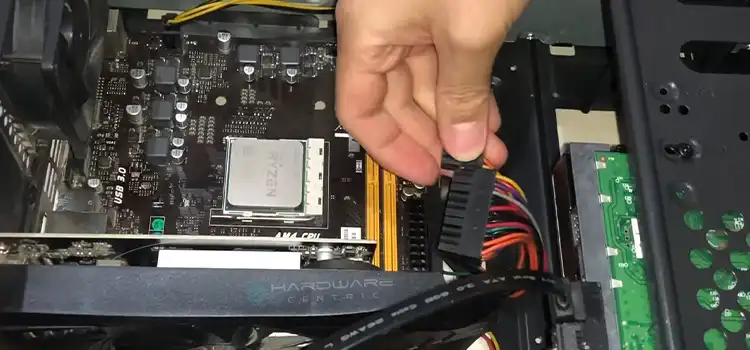
Step 3: Locate the 24-Pin Connector
This is typically a wide connector, bringing together a bunch of cables into one large block. It’s hard to miss and is generally located on the right-hand side of the motherboard.
Step 4: Release the Locking Clip
The connector has a small plastic clip on one side that locks it into place on the motherboard. Before trying to remove the connector, gently press down on this clip to release the lock.
Step 5: The Two-Handed Approach
Hold the connector with one hand and use your other hand to support the motherboard. This ensures that you won’t apply excessive pressure on the motherboard while pulling the connector.
Step 6: Gentle Wiggle and Pull
Rather than forcefully yanking the connector straight out, employ a gentle wiggle method. Wiggle the connector side to side, not up and down, while applying a consistent pulling force away from the motherboard. This eases the pins out of their grip bit by bit.
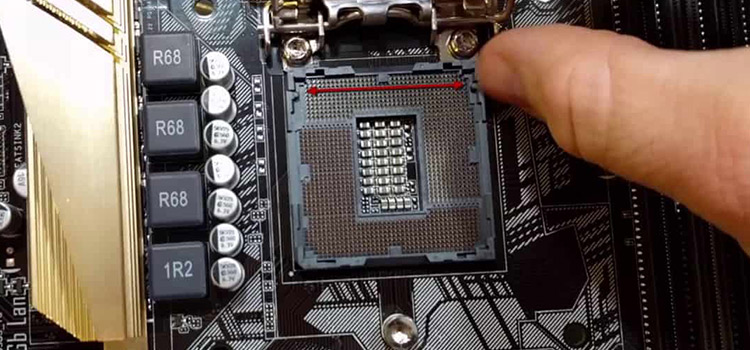
Step 7: Check the Pins
Once you’ve successfully removed the connector, it’s wise to quickly inspect the pins on the motherboard to ensure none are bent or damaged. A quick glance should suffice.
Step 8: Continue with Your Upgrade or Repair
With the connector safely removed, proceed with whatever upgrade, maintenance, or repair you had planned.
Difficulties You Might Encounter
- Too Tight: Some connectors feel super snug. This is because they’re designed to prevent unintentional disconnections.
- Locked in Place: If the locking clip isn’t fully depressed, the connector won’t budge.
- Fear of Damage: It’s natural to feel apprehensive about applying force, worrying about potential damage.
Pro Tips: Things to Consider for Safe Removal
- Stay Calm: It’s essential to stay calm and patient. If you feel the connector isn’t budging, take a break and come back to it.
- Avoid Tools: While it might be tempting, refrain from using tools. The tactile feedback from your fingers is invaluable.
- Support is Key: Always provide support to the motherboard from beneath when trying to disconnect the 24-pin connector.
- Check Alignment: Sometimes, the connector might not come off because it’s being pulled at an angle. Ensure you’re pulling it straight up.
Questions That Might Be Tugging at Your Sleeves
Why Is My 24-Pin Connector So Tight?
It’s designed to have a firm connection to prevent any accidental disconnections, especially since it’s the motherboard’s primary power source.
Can I Use Tools To Help With The Removal?
It’s advisable to use your hands to feel the connection. Tools might provide more force but can also cause damage if not used with extreme caution.
The Pins Look Slightly Bent. What Do I Do?
If upon inspection you notice slightly bent pins, they can be gently realigned using a tweezer or a small flat-head screwdriver. However, be cautious. If you’re unsure, it’s best to consult a professional.
Disconnecting the 24-pin connector (or any component) shouldn’t feel like a battle. With patience, gentleness, and the right approach, you can ensure the longevity of your components and carry on with your tech endeavors. Always remember, the journey of PC building is as much about patience as it is about skill.
Subscribe to our newsletter
& plug into
the world of PC Hardwares
![[7 Easy Fixes] Aura Sync Not Detecting Motherboard](https://www.hardwarecentric.com/wp-content/uploads/2023/09/Aura-Sync-Not-Detecting-Motherboard.webp)